How to make a shell hairstyle. Features of the shell hairstyle
Hairstyle "Shell" is a classic. It will never become old-fashioned, rather, it is a universal option for special occasions: special occasions, receptions and weddings. It is appropriate in the office, restaurant and even at a party.
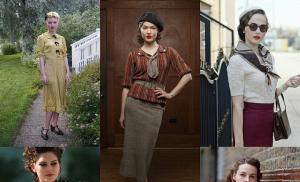
Unusual to look at the stars
fashion girls shell
blonde trend images
trend
The styling got its name due to the shape of the bun, resembling a shell. The hairstyle comes from France, so the shell is called a French bun or snail. The French call the styling a French twist or banane - for its similarity to the bends of a banana.
Hair features


You can style it on long hair, but medium length is also suitable. Thickness, volume, hair color, as well as face shape and age are not important. If you look at the photo, you can see that the shell is universal. Unrealistic hairstyle for short hair.
Keep in mind that the classic version of the twist is feasible on smooth strands. Owners of wavy curls will first have to straighten their hair with an iron.
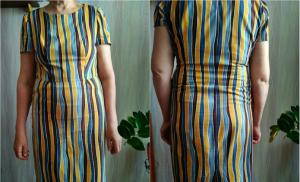
A shell is a sophisticated weapon of a woman. It opens the graceful lines of the neck, emphasizes a beautiful posture, creates an aura of elegance and subtlety of nature. Therefore, at social events there are many beauties with a French-style hairstyle.
Types of popular style
- Twist on wavy curls. Women with curly hair also want to look stylish. For them, the “Shell” hairstyle was invented, where the hair does not need to be straightened and styling products are applied. You will get a voluminous styling slightly careless, with protruding hairs. This creates an aerial image.
- Double French bun. An alternative to classic styling. It looks unusual - two shells twisted towards each other, as if in a mirror image. Perform a double French twist in the same way as the classic one. Only 2 strands are twisted towards each other and fixed. It's not easy to make your own.
- Informal shell. Suitable for extraordinary and eccentric women. It all depends on the imagination of the woman and the master. You can build a maxi-volume, make bundles of thin strands or pigtails on the sides, creating a Greek-style hairstyle. Non-standard styling is difficult to perform, so you need an extra pair of hands, and preferably 2!
- Pin-up hairstyle. You can give a classic styling a vintage spirit by making a shell on the side. Twist the bun loosely, with soft waves, complete with bouffant and high bangs. Laying needs strong fixation, otherwise it will fall apart at the slightest breath of breeze.
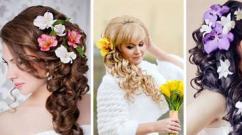
- Wedding styling. This is a sophisticated version of the classic twist with curls. It looks beautiful and elegant, but is suitable for girls with long curls. First, do the “Shell” hairstyle, but leave the ends of the strands outside - curl them beautifully and lay out a fantasy pattern of curls on the crown. Secure each strand with hairpins.
Execution steps
Laying is simple in execution, but requires skill. If you haven’t done it before, it doesn’t hurt to watch a video with a step-by-step master class and practice a little to get your hand. 


To transform curls into an elegant French hairstyle, stock up on a hairdressing kit. You will need:
- Massage brush - for combing strands before styling.
- A thin comb with a sharp long tip. Needed to form a pile and adjust the strands.
- Straightener - will be needed for owners of curly hair who want to make a smooth classic styling option.
- Invisible hairpins and hairpins for fixing strands.
- Strong fixation.
- Accessories for decoration - ribbons and headbands.
Let's get started: 
Treat the strands with a small amount of foam or mousse. This will ensure the strength of the structure. Do not style immediately after shampooing. Any hairstyle on clean hair is fragile.
- Walk through the curls with a massage brush. Lay the short bangs in the usual way, pin the long bangs to the side or remove them back, combing them.
- Pull back the head of hair on the left side and secure with invisible hair in the middle of the back of the head. You should get a vertical row of invisibles.
- Twist your hair with a tourniquet, keeping the opposite direction. Remove the remaining tip inside the structure.
- Secure the bundle with hairpins and fix the result with varnish. If you notice stray strands, fill with the sharp end of a comb-comb.
Step by Step Tips:
- do not make a shell on wet hair. It will be flimsy and will fall apart after the strands dry;
- do not get carried away with mousses and foams. An excessive amount will create the appearance of unwashed hair and ruin the look;
- strands released in front will help to give the image of femininity.
In Soviet times, the shell hairstyle was very popular. Years fly by, but it still remains relevant. If you have never done this hairstyle before, then you will need a step-by-step instruction showing how to properly make a shell out of hair. This styling is also called "French twist" or "snail". With her help, it will not be difficult to transform!
Hair styling features
This styling exposes the neck, while the image immediately turns out to be more elegant. Your posture immediately catches the eye. It is not surprising that such a hairstyle choose for many holidays including for weddings. Do not be upset if your hair is not very long - the average length also allows you to make a shell. But the main condition for performing hairstyles still needs to be observed - having straight hair. The shell will not turn out neat with curly strands, since it will not work to wrap the curls in a tight enough bun.
The shell is an excellent head decoration option for:

Age does not play any role here - this styling will suit almost everyone! Young girls will acquire more femininity, because the shell can bring a certain amount of mystery to the image. And mature ladies will highlight natural attractiveness with a shell, adding tenderness to the image. And you can play on opposites, combining such a gentle styling with a rough style of clothing (vamp, gothic, avant-garde, hard rock). Such a fatal image is clearly not left without attention!
Step by step instructions
So, it's time to find out the sequence of creating such beauty on your head! Of course, you must first wash your hair, after dry them natural way. Necessarily apply foam on curls- the hair should not bulge, otherwise it will not be possible to make a fairly smooth shell. The steps for making a shell are:
- Simply comb your hair to the left side, use hairpins to secure it asymmetrically at the back. The hairstyle will look very beautiful on the head with a side parting, with a straight one - the effect will not be the same.
- Next, you need to twist the strands inward - for this, wind your curls around your thumb. The ends should be inside.
- Now secure the resulting shell with hairpins. You can spray your hair with varnish.
Of course, it may not be perfect the first time. To do this, you need to fill your hand, so to speak. You might want to watch the video tutorial below.
 At the same time, there are little tricks, which can help facilitate the implementation of the snail hairstyle. For example, the hair must be well dried, otherwise the shell will simply fall apart in the first few hours after creation. You shouldn’t apply a lot of mousse - you don’t want to get the effect of unwashed hair, do you? Even a very beautiful hairstyle will look sloppy! Do you remember the famous Cinderella? In the cartoon, she also has a shell on her head! Release a few curls in front on the sides of the face and you're done - you resemble this kind heroine!
Another little trick: if your hand is unstable, and you can’t make a normal shell, then help yourself ... Chinese chopsticks! Just gather a low ponytail to one side, hold it between two sticks. Well, then it remains to start winding the curls to the middle of the back of the head on sticks. Be sure to secure the result with hairpins. Remember to gently pull the sticks out of your hair.
French double bun
We figured out the classic variation of the hairstyle. But let's look at a great alternative to the classics. Let's make a snail hairstyle in the French style.
Here, too, there is nothing particularly complicated. Looks like a hairstyle two shells, they are twisted towards each other. This hairstyle uses a mirror effect. Conclusion: a great option for a festive evening!
So, comb your hair well, here, too, the head should be washed. Double twist, basically done just like classic. Although it was not without differences (otherwise it would not have been a different hairstyle). At the back, twist two strands opposite each other, then fasten them together. The hairstyle turns out to be more fragile, so do not spare hairpins to secure it!
For curly hair
The above options are done on straight hair, as already mentioned. But there is a solution for curly hair too: a roller on curly hair make it more romantic. It remains only to consider step-by-step instructions for hairstyles for curly curls.
 With this styling, you will complement airy and light image of a young fashionista. In addition, your face may seem completely different to you - your hair will frame it beautifully. Do you naturally have curly hair? Well, great! An iron is not required!
Such a snail is made in the same way like the classic version. First we collect the hair in a ponytail - it can be long or medium, but for short hair, making a shell seems to be a problematic matter. We don’t use mousses and gels - you shouldn’t weigh your hair down. The hairstyle should look magnificent, therefore, by twisting the bun, you can even pull slightly messy strands out of it. After all, this is where the highlight lies - it is in the share of disheveledness and slovenliness! Due to this hairstyle and looks so interesting.
Extra touches
Any of the listed hairstyle options can be supplemented by showing imagination and using various accessories. The step-by-step process of creating shells will be unchanged. With the classic version, you can additionally pay attention to bangs and separate small strands. Leave downward spirals in the temple area (twist them). This will help emphasize the oval of the face, the neck will immediately become more elongated. And usually the tail is hidden inside the shell, but you can beautifully lay it out near the spiral, after making a corrugation.
 And jewelry will help make your hair even more stylish! You will shine at any celebration! Can be taken ordinary jewelry: sometimes it is enough to pin a shiny hairpin on the side to add a unique charm to the image.
With a snail hairstyle, you will become a real lady who knows how to present herself to society. At any event, a light and feminine styling in the form of a shell (aka a snail) will be appropriate. And if you use different jewelry every time and style the bangs differently, then the hairstyle will always look new. Experiment and amaze others with your sense of style.


There are a lot of different women's hairstyles that are easy to perform and visually attractive. This category should include a "shell", which can be assembled in several ways, in the light of which it is used for everyday life and celebrations, choosing the most suitable option and accessories.
A bit of history
"Shell" refers to the classic ideas for creating a female hairstyle, so it has remained popular among women and girls for quite some time. Its second name is considered “French bunch” or “banana” in the light of some similarity of the result with an exotic delicacy. Due to the mention of France, some masters claim that the "shell" appeared there.
Today it is difficult to say with certainty where such a hair styling fashion comes from, however, very similar variants of female images can be observed in paintings depicting European ladies of the 18th-19th centuries. In the history of earlier times, one can find information that the hair in the form of a seashell was collected by the ancient Egyptian rulers.


As far as modernity is concerned, The peak of popularity of the French beam came in the middle of the 20th century. At that time, such styling was positioned as solemn, therefore it was used in composition with evening dresses. Now the banana has become a great idea for creating a casual look, as well as a festive option, provided that you complement it with the appropriate accessories.
"Shell" allows you to make the neck more elegant, add elegance to the image, which makes it in demand among the fair sex of all ages.


Advantages and Features
The versatility of the shell is the main advantage of the hairstyle. It is due to the ability to beautifully collect hair of any length and structure. Laying in the form of a French beam with the help of hairpins can be obtained even on some short women's haircuts. In addition, for an evening or everyday "shell" it does not matter whether the strands are curly or even in their original state.
Banana features include the presence of a mass of options for creating a fashionable female hairstyle. This makes it possible to select an idea for individual features of appearance, lifestyle and other important nuances relating to the harmonious appearance of a woman. "Shell" is easy to make an office hairstyle or appropriate at a gala reception, a romantic date.


To make a French bun, it is not necessary to resort to the services of a master from a hairdressing salon, since the technology for its implementation allows you to experiment with options on your own with a minimum of additional tools and devices.


Styling options
Today, there are a large number of ideas for creating shells on the hair. It is worth highlighting the most popular.
"Banana" with a roller
A feature of this option is the ability to give your hairstyle additional volume, without bouffants and a large number of means for fixing. "Shell" is going with the help of a special roller, on which the hair is wound, hiding it inside. As a result, a neatly assembled bundle is obtained on the head, twisted inward, which is able to retain its shape for quite a long time due to the volumetric product in the middle.

"Shell" with a twister
This device will be useful for independent work with hair. The way to create a hairstyle is quite simple, it will be enough to twist the curls pass all the hair between the tube and twist the twister in the selected direction, forming a vertical "shell".


Wavy French Bun
The name of this styling option speaks for itself. It is recommended for creating an openwork and romantic hairstyle for curly hair. To achieve a similar result on straight curls, they are pre-curled with a curling iron or curlers. The created styling will be deliberately careless, which will make the image of a woman airy and feminine.
As a rule, a wavy "shell" suggests the presence of curls that stand out from the total mass.


Double "banana"
Such an idea stands out by creating two symmetrical tails on the hair, which will twist towards each other. "Shells" are fixed low at the back of the head, as well as additionally between each other. Usually a double version is made for long hair, using such styling for special occasions.

photos
Bow
Fantasy hair styling, which is formed from three strands of hair. This option will be suitable for girls, as well as older girls.

"Shell" with pigtails
For more experienced girls who actively practice creating hairstyles for themselves, the original version of the French braided bun will be an idea for home experiments with hair. The essence of styling comes down to weaving curls into several braids to the middle of their length, after which the strands should be collected according to the standard “shell” formation pattern.

"Banana" with a loop
A horizontal styling option that is created from the tail. Its ends are wrapped in the form of a loop and secured with hairpins or hairpins from below.

Tools
For the classic version of this hairstyle, you will need a minimum of accessories. As a rule, it will be possible to make a beautiful styling with the help of:
- scallop with a sharp handle and small teeth;
- hairpin, invisible;
- hair fixatives.


More complex shell variations may require additional tools and compositions:
- to create a fleece, you may need special massage brushes;
- to straighten or, conversely, curl curls, you will need to use a curling iron, iron or tongs;
- for coarse or unruly hair, before styling, they must be treated with styling compounds;
- evening or ceremonial styling may require additional hairpins, jewelry, etc.;
- to facilitate the creation of a “shell”, rollers, twisters, bambits and other products that accelerate the fixation of hair are often used.


How to do it yourself?
"Shell" is considered a fairly simple option for self-creation, the main thing is to gain a little practical experience. However, a beautiful result can only be obtained if the hair is pre-prepared for subsequent fixation. There are several recommendations for working with curls before styling.
- In order for the strands to lie down correctly, they should be washed, and also treated with an additional balm or rinse aid. This is necessary in order for the curls to become soft and pliable.
- You should only work with dry hair, because wet hair styled after it dries may not hold its shape, which will ruin the look of the hairstyle. It would be more correct after washing to dry the strands with a hairdryer on a cold air mode, combing them in the process with a brush in the backward direction. This will allow you to straighten the rods and set them in advance in the direction in which they will lie in the future.
- In some cases, after drying, you will need to additionally use an iron to straighten your hair. This is especially true for naturally curly curls, which are planned to be laid in a smooth “shell”.
For special occasions, before styling, it will be more correct to dress in advance so as not to spoil your hair later.


Instructions for creating a classic French beam are as follows.
- Curls along the entire length are recommended to be lightly treated with a fixing compound of your choice, dried naturally and combed. For thin hair, you can create a small bouffant at the roots with a brush.
- Next, they must be collected in a ponytail at the back of the head, but without fixing with an elastic band. Curls along the entire length will need to be twisted with a tourniquet and made into a roller out of them, twisting in one direction. The ends for a neat appearance and fixation should be hidden inside, fixed with hairpins if the hair is too long. On medium hair, you can use several invisible ones. So that short hairs do not stick out of the hairstyle, they need to be smoothed with your hands, spraying the entire styling with varnish.


Another option for "shells" will be a hairstyle without a tourniquet. Step by step how to make it yourself.
- The initial steps will be the same as in the case of the classic styling method - the hair must be washed and dried, and a fixing composition applied to them. It is best to distribute the foam or mousse through the hair with a comb.
- Next, the curls are collected in a tail, which should be taken a little to one side, on the other, collecting all the broken hairs. After that, the entire volume is twisted into a roller, the ends are hidden inside. Laying is fixed with hairpins or hairpins.
- The final touch will be to fix the result with varnish.
Very long hair can be styled with a “banana” using two Japanese chopsticks. In addition, hairpins of a similar type are also on sale. The algorithm of actions will be as follows.
- Combed and clean hair is collected in a side ponytail without fixing with an elastic band at the base. It must be clasped with chopsticks, and the hair twisted into a roller so that the hairstyle acquires a direction in the opposite direction from the one on which the tail was made.
- When all the hair is twisted and the ends are tucked into a "shell", it must be chopped off with hairpins. Fix with varnish if necessary.


A shell hairstyle for medium hair is a classic styling option. Ideal for work or study, as well as for evening and solemn events. Performing it at home is quite simple - the main thing is to decide on the type of desired styling and study the nuances of creating an elegant image.
Who will suit
The main advantage of the hairstyle is versatility. She looks equally beautiful on different lengths of hair. But experts note: it will be easier to perform it on straight curls. Therefore, for girls with curly hair, it is better to straighten them with an iron first.
Other benefits also include:
- The styling has many options. It will complement any look - everyday, wedding, evening.
- If you practice several times, then it will take very little time to create hairstyles the next time.
- An ideal choice for owners of thin, weakened hair. Laying curls in an elegant shell creates additional volume. Also strands can be corrugated or lightly piled.
- The image can be supplemented with any accessories to your taste - a hoop, shiny hairpins, decorated with bows, hairpins, which will give it more brightness and sophistication.
- No special tools are required for installation. Even a beginner can cope with the task.
Required Tools
- Massage comb. It is better to choose a large square or flat medium hardness. It will help to give the strands the necessary shape, comb tangled hair without tearing it out.
- A brush with small teeth and a pointed tip. The accessory is indispensable for quickly separating curls, creating a parting or bouffant.
- Curling iron with wide plates. If the hairstyle is supposed to be smooth, with strict straight lines, then before styling it is necessary to straighten the hair well.
- Styling products - varnish, mousse, foam, gel. They should be strong fixation and help keep the beautiful look of the strands for the whole day.
- To secure, you will also need invisible, hairpins, hairpins.
- If desired, for a solemn event, curls can be decorated with various accessories - a headband, a bow, flowers, decorated hairpins or a comb.
Types of hairstyles
There are many types of shell hairstyles for medium hair. It is worth choosing them from your own preferences, as well as depending on the event for which the styling is being created.
classical
The basis of the classic French hairstyle is a simple tourniquet. Having learned how to make this element, it will be possible to continue making the traditional “snail” without any problems.
- Apply a little foam to clean hair, so it will be easier to work with them. Dry.
- Comb the strands, collect at the back of the head.
- Do not fix the tail with an elastic band, start twisting it into a tight tourniquet. If you want the hairstyle to look more casual, you can make it a little looser.
- Wrap the tourniquet in a loop, hide the ends of the curls inside the shell.
- Secure the "snail" with studs or invisible.
- Comb the loose hairs back with a thin comb.
- Fix the result with varnish.
Evening
The evening version is created according to the classical scheme. But you can complement it with a variety of shiny or more discreet decorations.
- You can add gloss by using glitter varnish as a fixation.
- You can complement the image with small decorated hairpins, hairpins with pearls, a scallop or a rim with rhinestones.
- Fresh flowers can serve as an original accessory in the summer.
- You can leave one or more curls on top without twisting into a shell. Screw or corrugate them. The strands will serve as an elegant frame for the face.

Wedding
For such a special celebration, a romantic, gentle image is created. Feminine shell styling will help to decorate it.
Important! If the bride wants an original variation of the hairstyle, the tourniquet can be collected at the crown, almost at the neck, on the right or left - almost at the temple, twist it diagonally.
Fresh flowers, hairpins with rhinestones, tiaras, scallops are used as decorations. The shell visually makes the girl's neck longer, and the silhouette more elegant.

double french bun
An interesting and unusual variation of the classic styling. Especially suitable for owners of thick and voluminous hair.
- Divide the curls into three parts. The first is the strands of the upper part of the head. The second is the occipital region. The third is the bottom.
- Start working on the third part. Twist the strands into a bundle, directing it upwards. Hide the ends of the strands into a shell. Secure with pins.
- With the separated curls at the back of the head, the same steps must be done, but the second beam must be fixed downwards. The result is two equally spaced "snails".
- Next, start working with the upper strands. They can be slightly combed, making a voluminous "tuft". Or divide it into two parts, wind the curls so that they fall, framing the face. Another option is to treat the hair with a small amount of gel, form a wave (which goes to the right or left) and fix it with invisibility.
- If desired, decorate your hair with decorated hairpins, hairpins, a hoop.
- The final stage is fixing the double shell with varnish.

Step by step instructions for shell hairstyles:
- Prepare your hair for styling. Comb strands with a thin comb, spraying each with varnish. Select a parting. It will look very impressive with a side parting.
- Gather the curls at the back of the head, without securing with an elastic band, twist into a tourniquet. Next, wrap it in a shell, hide the ends of the strands in the formed "snail". If you want a more restrained hairstyle, make the tourniquet tight. For a more romantic and casual look, leave your hair a little looser.
- The final touch is fixing the styling with varnish.

Important! If you want the effect of luxurious professional styling - do not comb the front strands, leaving them smooth.
For many years, styling a shell with a bang has not lost its relevance.
- Forming a tourniquet, the bangs must be separated, since in the future it can be effectively laid.
- To create a voluminous hairstyle, pin it back, after combing it a little.
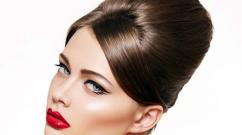
- For a hairstyle in the style of the 60s, comb the bangs well, apply a little mousse, form a smooth wave out of it. Spray with varnish, secure with invisibility to keep the shape for the whole evening.
- It will look original if you separate the front strands with a hoop or silk ribbon.
- Experts advise not to style short bangs, but simply sprinkle lightly with varnish for fixation.